Lynis is a security auditing tool for UNIX derivatives like Linux, macOS, BSD, Solaris, AIX, and others. It performs an in-depth security scan.
Enjoy!
Lynis is a security auditing tool for UNIX derivatives like Linux, macOS, BSD, Solaris, AIX, and others. It performs an in-depth security scan.
Enjoy!
This indicates detection of an attempted scan from Masscan port scanner.
Port scanners are used to probe computer networks to see which ports or services are available. An attacker may utilize a scanner to identify what services the target system is running and perform further attacks based on its findings. This signature detects for HTTP traffics associated with Masscan.
Affected Products
All web servers.
Impact
Information Disclosure: Remote attackers can gain sensitive information from vulnerable systems.
Recommended Actions
Monitor the traffic from the network for any suspicious activity.
Other References
https://github.com/robertdavidgraham/masscan
Log Example:
138.68.247.104 – – [10/Nov/2019:21:56:30 -0500] “GET / HTTP/1.0” 301 229 “-” “masscan/1.0
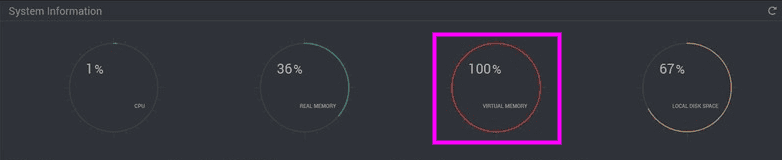
Flushing the Swap file (Virtual Memory):
# swapoff -a && swapon -a
Disabling the Swap File:
# sudo swapoff -a
Permanently Disabling the Swap File:
# nano /etc/fstab
And # hash out the line indicated as swap then reboot:
/etc/fstab
/dev/mapper/centos-root / xfs defaults 0 0
UUID=5cd945c2-5ca7-48c5-b67b-0f3610534e8f /boot xfs defaults 0 0
/dev/mapper/centos-home /home xfs defaults 0 0
# /dev/mapper/centos-swap swap swap defaults 0 0
Good day!
I am running the latest version: Webmin v1.932
I was searching for a while on how to remove the Webmin logo in the login screen and other stuff related to the Webmin admin page!
Here is the solution that worked for me.
Locate “session_login.cgi” and edit it in here…, /usr/libexec/webmin/authentic-theme/session_login.cgi and remove the Webmin heading and logo by taking out the code lines below:
Look for the line code: #114 to #119 and remove the code.
print '<i class="wbm-webmin"></i><h2 class="form-signin-heading">

<span>'

. (

&get_product_name() eq 'webmin'

? $Atext{'theme_xhred_titles_wm'}

: $Atext{'theme_xhred_titles_um'}

) . '</span></h2>' . "\n";
![]()
I removed the “must enter username and password…” text code by removing the line #126:
print '<p class="form-signin-paragraph">' .

&Atext('login_message') . '<strong> ' . $host .

'</strong></p>' . "\n";
![]()
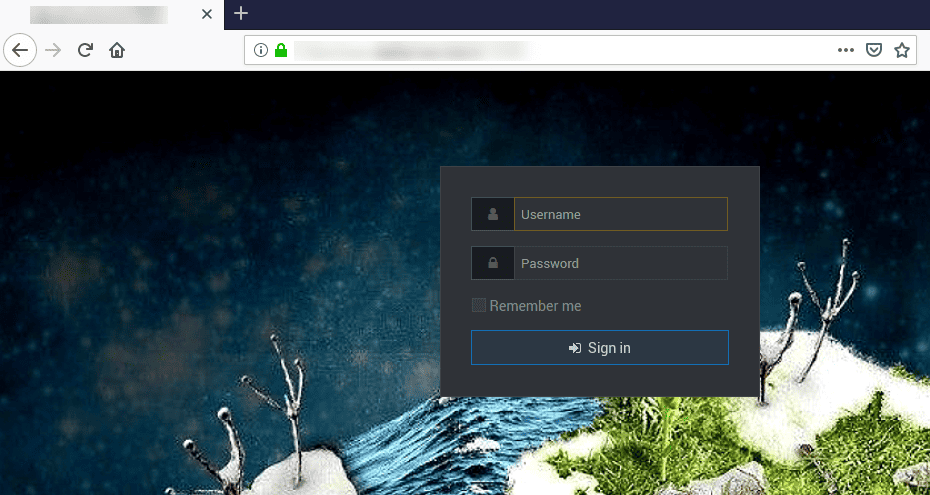
Here is the semi-final result:
![]()
NOTE: After a Webmin update you will have to redo all steps!
We are not done yet!
Now let’s remove the “Login to Webmin” in the browser tab title.
Locate the file in /usr/libexec/webmin/authentic-theme/authentic-lib.pm
Comment out lines #1749 to #1755 to remove the page title.
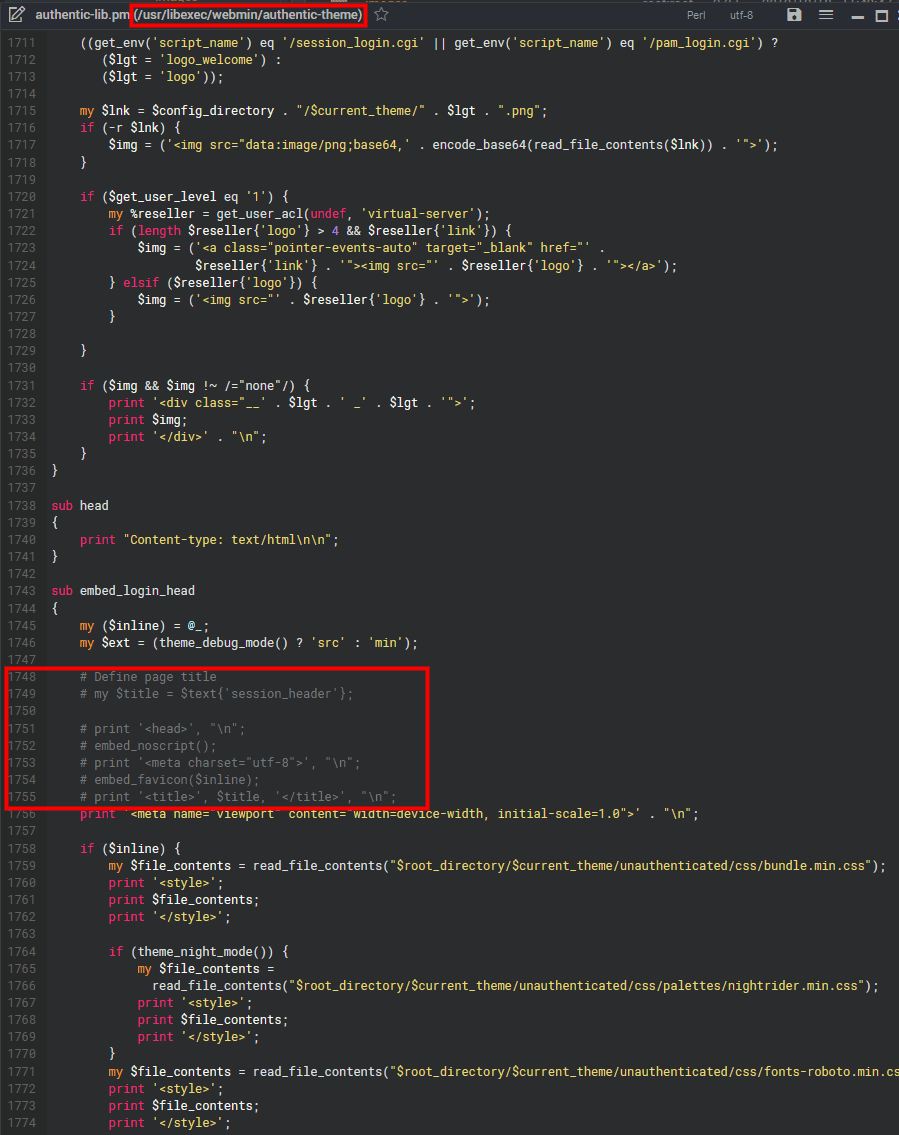
Now verified that the title is gone! You will see your *”domain name” instead of the “Login to Webmin” title.
We are almost done here!
Now let’s remove or change the Webmin favicon.ico
Navigate to /usr/libexec/webmin/ and locate the favicon.ico and rename it to favicon.ico-renamed. Upload your own favicon.ico in /usr/libexec/webmin/
Here is the final result:
![]()
My last suggestion would be to change your webmin port 10000 to another one.
Here you go!
With over 2.5 million copies sold on PC (digital download), 7 Days to Die has redefined the survival genre, crafting and world-building content. Set in a brutally unforgiving post-apocalyptic world overrun by the undead, 7 Days to Die is an open-world game that is a unique combination of first person shooter, survival horror, building, and role-playing games.
The best update so far!
Deploy date to public : 10-07-2019 (12:45pm Est Time)
Enjoy!

“Well! We have just one!
Step 1: Open a terminal window
# su – or # sudo -s
Step 2: Creation of the Storage File for the new swap file
Type the following command to create 512MB swap file (1024 * 512MB = 524288 block size):
# dd if=/dev/zero of=/swap bs=1024 count=524288
If you don’t want to have to reboot use the following commands:
(This is useful for debugging automout issue)
524288+0 records in
524288+0 records out
536870912 bytes (537 MB) copied, 3.23347 s, 354 MB/s
1. if=/dev/zero : Read from /dev/zero file. /dev/zero is a special file in that provides as many null characters to build storage file called /swap.
2. of=/swap : Read from /dev/zero write storage file to /swapf.
3. bs=1024 : Read and write 1024 BYTES bytes at a time.
4. Count=524288 : Copy only 523288 BLOCKS input blocks.
Step 3 : Secure the new created swap file
Setup the correct file permission:
# chown root:root /swap
# chmod 0600 /swap
A world-readable swap file is a huge local vulnerability.
Step 4: Set up a Centos 7 swap area
Type the following command to set up a Linux swap area in a file:
# mkswap /swap
Sample outputs:
Setting up swapspace version 1, size = 524284 KiB
no label, UUID=0e5e7c60-bbba-4089-a76c-2bb29c0f0839
Step 5: Enabling the swap file
Finally, activate /swap swap space immediately, enter:
# swapon /swapfile1
Step 6: Update /etc/fstab file
To activate /swap after CentOS 7 system reboot, add entry to /etc/fstab file. Open this file using a text editor such as nano:
# nano /etc/fstab
Copy & Paste the following line:
/swap none swap sw 0 0
Save and close the file.
Verify if your swap file is activated?
# free -m
total       used       free     shared    buffers     cached
Mem:          1876       1798         77          0        119       1440
-/+ buffers/cache:        237       1638
Swap:         4607          0       4607
Display swap usage summary
# swapon -s
Filename				Type		Size	Used	Priority
/dev/sda6                               partition	4194296	0	0
/swap                                   file		524280	0	0
Another option is to view /proc/meminfo file:
# less /proc/meminfo
# grep -i –color swap /proc/meminfo
SwapCached:        30748 kB
SwapTotal:       6291448 kB
SwapFree:        6154008 kB
Optional, test the new swap file:
# swapoff -a
# swapon -a
Enjoy!
We had a strange bug in OC 3.x! When adding a PDF link outside of the OC files structure on the same domain name?!
mod_sec = nothing in my log’s,
.htaccess NO LUCK HERE!
The fix!
Just call your pdf file(s), https / http ,.. link inside your image directory structure ! ,,… ,, just create the OC directory “/image/catalog/terms (Or any name), use filezilla to upload your PDF file.
The bottom line is that you cannot call a non-OC directory, Ex,.: public_html/yournamehere/download/
must be located inside the OC structure:
public_html/yournamehere/image/catalog/…
Enjoy!
Whether installing a new physical hard drive to a server or adding an additional disk to your cloud server or VPS, you’ll need to configure CentOS to be able to use it.
We’re going to assume the drive is connected, so first of all, we need to find it.
First of all, we need to know the naming convention your server is using for drives, and we can find this with the ‘df’ command.
[user@server ~] df
Filesystem     1K-blocks    Used Available Use% Mounted on
/dev/vda2       24733776 2521604  20942668  11% /
/dev/vda1        1007512  203260    751824  22% /boot
The two lines above show that this particular server is using the vd* notation, but sd* is also used. Here the primary drive, vda, has two partitions – vda1 and vda2.
We can now use the following command to find other disks:
[user@server ~] ls -1 /dev/[sv]d[a-z]
/dev/vda
/dev/vdb
We can see both our original disk, vda, and the new disk vdb. Now to create a filesystem the new disk with the ‘mkfs.ext4’ utility.
[user@server ~] sudo mkfs.ext4 /dev/vdb
This will just take a few seconds.
To use the new disk we now need to mount it. When you’ve decided where you want to mount the disk, first create that folder on your server. We’re going to use ‘home2’ for our disk.
[user@server ~] sudo mkdir /home2
We can now mount the disk to that location:
[user@server ~] sudo mount /dev/vdb /home2
Revisiting the df command we can now see that the new disk is mounted.
[user@server ~] df
Filesystem     1K-blocks    Used Available Use% Mounted on
/dev/vda2       24733776 2521604  20942668  11% /
/dev/vda1        1007512  203260    751824  22% /boot
/dev/vdb        25000000     100  24999900   1% /home2
To ensure the disk is automatically mounted when the server is rebooted, we also need to add it to fstab. Our preferred editor is ‘nano’ so we type
[user@server ~] sudo nano /etc/fstab
We add, to the end of the file, the line:
/dev/vdb /home2 ext4 defaults 0 0
Then CTRL + O to save and CTRL + X to exit.
The disk will now stay mounted after reboot and you can begin using it.
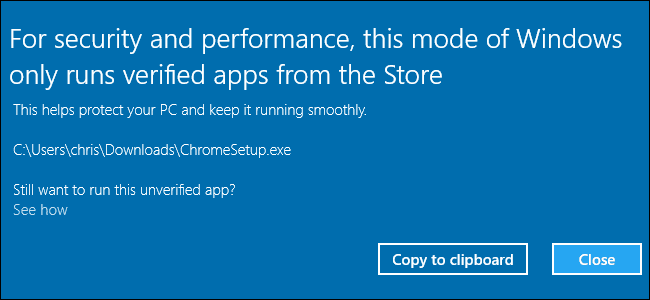
Good day, I had a issue with a new laptop Acer Swift that used Windows 10 S mode to prevent any installation of software not created by Microsoft! This is very annoying! Here is a quick fix to solve this problem.
First you will need to create those 2 files using notepad
First file
ei.cfg < filename to create
Inside this file you will add those lines
[EditionID]
Professional
[Channel]
Retail
Now save the file on your local hard drive.
Second file
pid.txt
Inside this file you will add those lines
[PID]
Value=XXXXX-XXXXX-XXXXX-XXXXX-XXXXX
You will need to type your Windows 10 Pro license
Now save the file on your local hard drive.
You will then need to copy those (2) files to the new created windows 10 Pro USB key.
Copy both files in the root of the key
Copy both files in /source
Reboot and install Windows 10 Pro.
Enjoy!