I ran into problem trying to import a large database on a fresh CENTOS 7 test lab! After setting up value in php.ini (I am running PHP version 7.0.27). I was still not able to import the database in phpmyadmin.
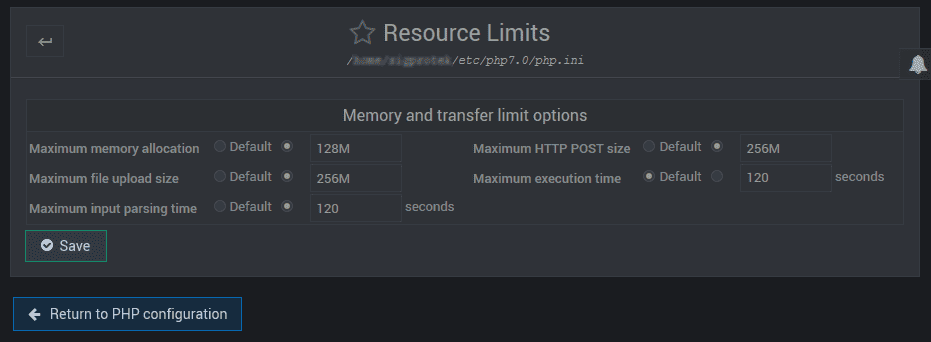
Notice the Maximum execution time is set to 120 seconds
Even after changing this value for 240-500, 700 seconds… I am still having issue importing the database!
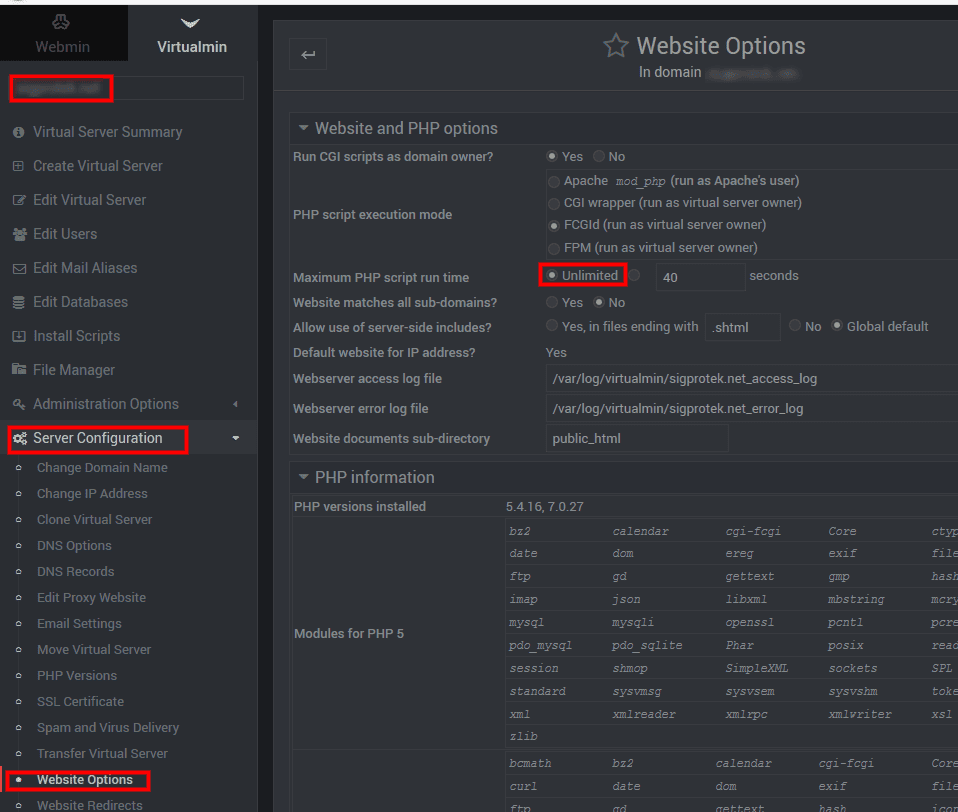
Here is the fix,… you need to go in Virtualmin
1. Select the virtual server
2. Navigate to -> Server Configuration -> Website Options
3. In Website and Php options navigate to Maximum Php script run time
I checked “Unlimited” and hit “Save”
Voilà, I am able to import this large database without any errors!
For security reason I suggest that you put back the default value after your importation is finish!
After upgrading to Windows 10, I have had some issues with a couple of RDP connections that wouldn’t store the username and password (credentials). Despite ticking the box to save the credentials, it would always prompt me to enter the password.
Here’s how to fix the issue with RDP not saving the login information, which should work not just on Windows 10, but also other versions of Windows if you have the same problem:
Click Start and type “GPEDIT.MSC” to search for the shortcut to the Windows Group Policy Editor.
Right-click the gpedit.msc shortcut and click run as Administrator.
(Ignore any popups about errors if you get any when the Group Policy Editor console opens up).
Browse to Local Computer Policy > Computer Configuration > Administrative Temples > System > Credentials Delegation
Double click the setting called “Allow delegating default credentials with NTLM-only server authentication” to edit it.
Change the setting to “Enabled” and then click the “Show…” button in the “Options:” window where it says “Add servers to the list:”.
Double click the field below “Value” (with the black arrow to the left) and type in “TERMSRV/*” (without the double quotes).
Click Ok and then Ok again to close both popups, so that you only see the list of settings again.
Now just repeat the exact same for these three policies as well: Allow delegating default credentials Allow delegating saved credentials Allow delegating saved credentials with NTLM-only server authentication
Close the Local Group Policy Editor and RDP should now work as expected again!
First you will need to install LAMP (Linux, Apache, Mysql, PHP) on a fresh Dedicated standalone server! (Do not install on a VPS)
Here is a good online tutorial about deploying LAMP on CentOS
Disable SeLinux?
Edit the /etc/selinux/config file to set the SELINUX parameter to disabled, and then reboot the server.
I have noticed after turning back “on” SeLinux after the full installation bellow, that the server is holding!
Still a lot of testing to do but! Working 😉
Install Apache
# sudo yum install httpd
Once installed, you can start Apache
# sudo systemctl start httpd.service
The last thing you will want to do is enable Apache to start on boot. Use the following command to do so:
# sudo systemctl enable httpd.service
How To Find your Server Public IP
If you do not know what your server’s public IP address is, there are a number of ways you can find it. Usually, this is the address you use to connect to your server through SSH.
From the command line get your IP address by typing:
# curl https://ipinfo.io/ip
I suppose you already have proper DNS Server setup!
If you don’t have proper DNS just use your server local IP by running the following command:
# ip a
Install MySQL (MariaDB)
# sudo yum install mariadb-server mariadb
When the installation is complete, we need to start MariaDB with the following command:
# sudo systemctl start mariadb
Now that our MySQL database is running, we want to run a simple security script that will remove some dangerous defaults and lock down access to our database system a little bit. Start the interactive script by running:
# sudo mysql_secure_installation
The prompt will ask you for your current root password. Since you just installed MySQL, you most likely won’t have one, so leave it blank by pressing enter. Then the prompt will ask you if you want to set a root password. Go ahead and enter Y, and follow the instructions:
Enter current password for root (enter for none): OK, successfully used password, moving on…
Setting the root password ensures that nobody can log into the MariaDB root user without the proper authorization.
New password: password Re-enter new password: password Password updated successfully! Reloading privilege tables.. … Success!
For the rest of the questions, you should simply hit the “ENTER” key through each prompt to accept the default values. This will remove some sample users and databases, disable remote root logins, and load these new rules so that MySQL immediately respects the changes we have made.
The last thing you will want to do is enable MariaDB to start on boot. Use the following command to do so:
# sudo systemctl enable mariadb.service
Install PHP
We can once again leverage the yum system to install our components. We’re going to include the php-mysql package as well:
# sudo yum install php php-mysql
This should install PHP without any problems. We need to restart the Apache web server in order for it to work with PHP. You can do this by typing this:
# yum search php-
If you are running a firewall, run the following commands to allow HTTP and HTTPS traffic: At the same time let’s open port 3000 for Node.js!
Install Node.js and npm from the NodeSource repository We will install Node.js v6 LTS and npm from the NodeSource repository which depends on the EPEL repository being available.
To enable the EPEL repository on your CentOS 7, issue the following command:
# sudo yum install epel-release
Once the EPEL repository is enabled run the following command to add the Node.js v6 LTS repository:
After downloading Orangescrum you will need to unzip master.zip. To do this, run:
# yum install unzip
# unzip master.zip
# mv orangescrum-master /var/www/html/
We will need to change some folders permissions:
# chown apache:apache -R /var/www/html/
I am still missing something here for the 0777
Configuring MariaDB for Orangescrum
By default, MariaDB is not hardened. You can secure MariaDB using the mysql_secure_installation script. You should read each steps below carefully which will set root password, remove anonymous user, disallow remote root login, and remove the test database in your MariaDB (MySQL) Server:
# mysql_secure_installation
Configure it like this:
Set root password? [Y/n] y
Remove anonymous users? [Y/n] y
Disallow root login remotely? [Y/n] y
Remove test database and access to it? [Y/n] y
Reload privilege tables now? [Y/n] y
Next we will need to log in to the MariaDB console and create a database for the Orangescrum. Run the following command:
# mysql -u root -p
This will prompt you for a password, so enter your MariaDB root password and hit Enter. Once you are logged in to your database server you need to create a database for Orangescrum installation:
CREATE DATABASE orangescrum; CREATE USER ‘orangescrumuser’@’localhost’ IDENTIFIED BY ‘PASSWORD’; GRANT ALL PRIVILEGES ON orangescrum.* TO ‘orangescrumuser’@’localhost’ IDENTIFIED BY ‘password’ WITH GRANT OPTION; FLUSH PRIVILEGES;
Username : orangescrumuser Password : PASSWORD *CAP is important here!~ Database : orangescrum
Next you need to import the data from the database.sql file located in the /var/www/html/ directory:
# cd /var/www/html/
# mysql -u orangescrum -p password < database.sql
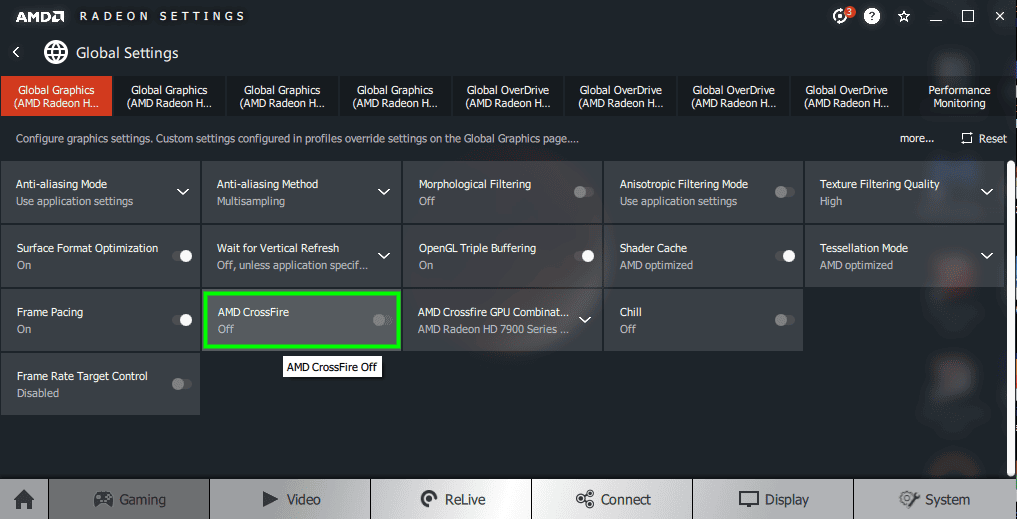
Next, By default STRICT mode is set to on in MySQL. You will need to disable it:
Next step, Now you need to change the post_max_size and upload_max_filesize to 200M in the php.ini file:
# nano /etc/php.ini
Find and change those values
post_max_size=200M
upload_max_filesize=200M
You may use those commands:
# cp /etc/php.ini /etc/php.ini.baksudo sed -i "s/post_max_size = 8M/post_max_size = 200M/" /etc/php.inisudo sed -i "s/upload_max_filesize =2M/upload_max_filesize = 200M/" /etc/php.ini
Configuring Apache web server for Orangescrum
We will create Apache virtual host for your Orangescrum website. First create ‘/etc/httpd/conf.d/vhosts.conf’ file with using a text editor of your choice:
Next, you need to provide your valid email address and password for SMTP, and update the FROM_EMAIL_NOTIFY and SUPPORT_EMAIL configurations in the constants.php file:
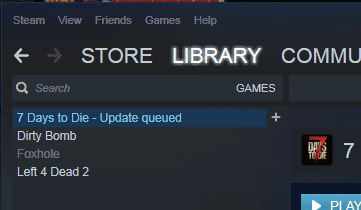
With over 3 million copies sold on PC (digital download), 7 Days to Die has redefined the survival genre, with unrivaled crafting and world-building content. Set in a brutally unforgiving post-apocalyptic world overrun by the undead, 7 Days to Die is an open-world game that is a unique combination of first person shooter, survival horror, tower defense, and role-playing games.
If you don’t want to deal with that sort of thing you may wish to consider waiting until the stable build is released. It has been mentioned that TFP would love to do a 3 week or less experimental. Hopefully things work out in their favor so that those of you waiting on the stable build don’t have to wait all that long.
Anniversaries: Lynis project (11 years) and CISOfy (5 years)
The Lynis project celebrated its 11th birthday last week! Also, Lynis 2.7.0 was released last week. Did you already upgrade?
If you think about it, it is rare. Just a handful of open source security projects reach the age of 10 years AND are still actively maintained. The secret? As its project founder, I believe it is dedication, involving the community, and helping others with sincere promotion.
Staying committed
It is hard for developers to stay involved with a project on a daily basis, especially if one has a full-time job and personal commitments.
To ensure the Lynis project would not suffer from the same issue, the company CISOfy was founded 5 years ago. The first priority for the company was getting the project back on its tracks and enhance its code.
Another special milestone is that we also reached a point where both the open source version and a commercial offering (demo) can co-exist. They increase value in both directions.
So let me take this moment to thank the community and also our customers who trust our solution. Both the standalone tool and solution would have been very different without your feedback and suggestions!
Teamspeak is a VOIP server that can be used for teams or multiple people to communicate. It is relatively lightweight, and secure, as updates are released regularly.
How to install Teamspeak on a CentOS instance.
Prerequisites
Before we begin, you’ll need:
CentOS 7 system (64 bit only).
512 MB of RAM or higher.
wget (utility used for downloading files).
nano or vim (any text editor is fine).
Installation
Prerequisites
Update the system packages. This may take some time.
yum update -y
Install tools needed for this tutorial.
yum install nano wget perl tar net-tools bzip2 -y
Installation
Add an unprivileged user to run Teamspeak. When prompted, enter your desired password.
useradd ts
passwd ts
Retrieve the Teamspeak server software.
Make sure you have the latest release here
cd ~
wget http://dl.4players.de/ts/releases/3.0.13.8/teamspeak3-server_linux_amd64-3.5.0.tar.bz2
Extract the Teamspeak tarball and copy all of the files to our unprivileged user’s home directory.
tar -xvf teamspeak3-server_linux_amd64-3.5.0.tar.bz2
cd teamspeak3-server_linux_amd64
cp * -R /home/ts
Remove temporary files.
cd ~
rm -rf teamspeak3-server_linux_amd64
rm -rf teamspeak3-server_linux_amd64-3.5.0.tar.bz2
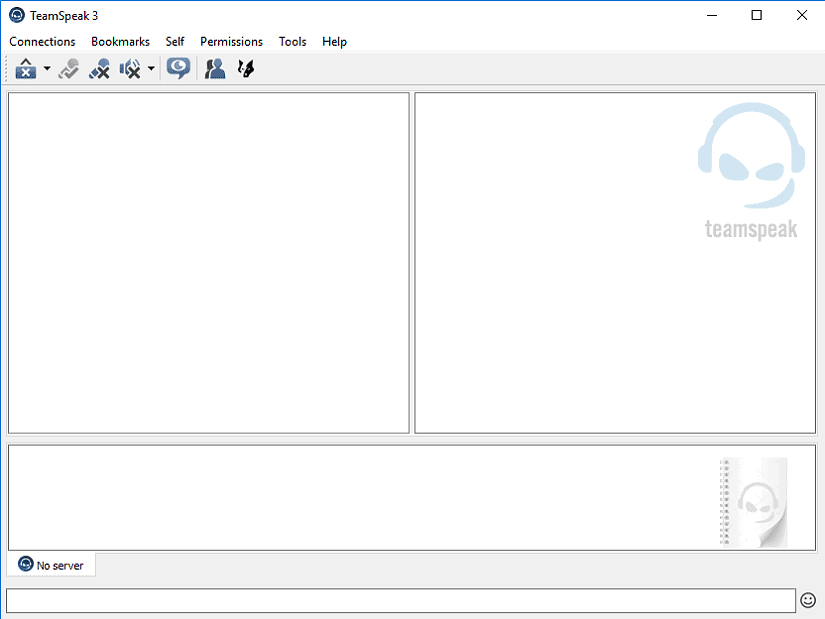
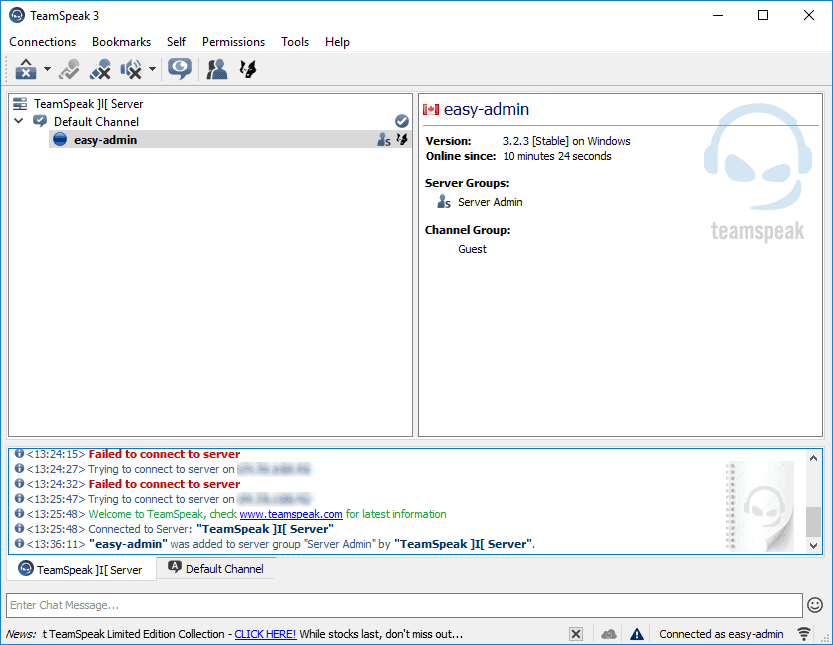
Congratulations! You’ve successfully created a Teamspeak server. You can connect to it with the Teamspeak Client. Sorry, for mobile they have a paid version for iPhone and Android! Hummm
This is what it should look when you are connected!
NOTES :
– Make sure you CHOWN all files to ts:ts
– Create this empty file where your server directory is located to accept the license terms .ts3server_license_accepted
– To retrieve the privilege key you need to check the Logs in the /Logs directory where you installed your Teamspeak server
In this tutorial, we’ll be installing Speedtest-cli to test the network speed of your server. Speedtest-cli is a command line interface for the popular speed-testing service, speedtest.net. It is quite simple to do and will only require basic Linux knowledge. This tutorial will work on CentOS 5, 6, and 7.
Dependencies
Before we do anything, we must install one dependency.
yum install -y python
Installation
Enter the root directory.
cd ~
Retrieve the Python script using wget. This script was written by Sivel; you can learn more about it on the GitHub page.
Was trying to install Centos 7 on a HP Proliant G7 DL380 Server and received some strange NMI errors! I was booting from a fresh version of Centos 7! The error was generated by NMI. First I taught it was memory related, I tested like 30 different DDR3 Memory sticks!
No luck it’s not memory related
Centos 7 is installed on the G7 Server,.. CentOS load but hang with all kinds of weird errors related to NMI!
The weird part: I was able to install Windows Server 2012 R2 without any problem?
By digging this error since 4 days and did a lot of test! I found out what was the cause of this nightmare bug!
Easy fix here!
Power on your server and go into the bios settings (F9)
Disable Hypertread technology!
reboot your server, CentOS 7 latest Minimal install should Boot now!!
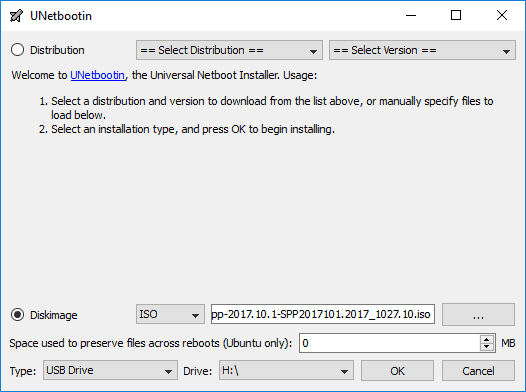
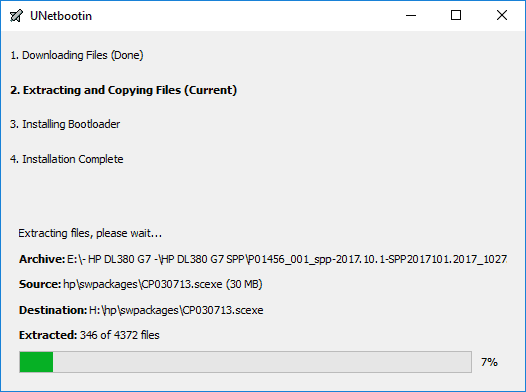
When trying to patch a HP DL380 G7 Server to the latest service pack (SPP) I ran into a problem creating a valid USB Boot Key! When trying to boot the server using the USB Key it seem that I was missing some files when I build the USB Key using Rufus latest flavor!
I found the perfect tool to make this work. Download and install UNetbootin Diskimage to copy the bootable .ISO over to the USB Flash Drive.