In the article I will eleborate how to install a 2048 Bits RSA Encryption Key for multiple Virtual Server on your Webmin/Virtualmin system.
Generate the RSA Key in your /home/accountname/.ssh
To do that, you can log in as the SSH user in question, navigate to the /home/accountname/.ssh folder, and run this command:
ssh-keygen -t rsa
That will generate (2) key files.
id_rsa and id_rsa.pub
id_rsa = Client
id_rsa.pub = Server
Next step will be to add or create a file called authorized_keys inside the /home/accountname/.ssh
Open a text editor leave it blank and copy the content of the id_rsa.pub key. Save the file & upload it to your server into /home/accountname/.ssh
Now download your id_rsa key on your system in a safe place.
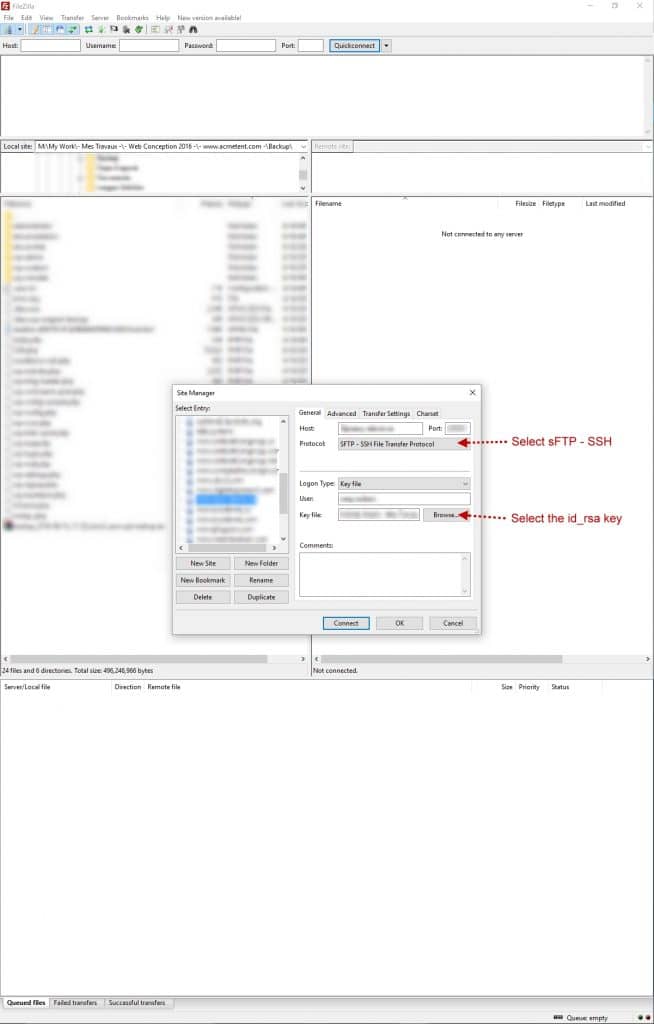
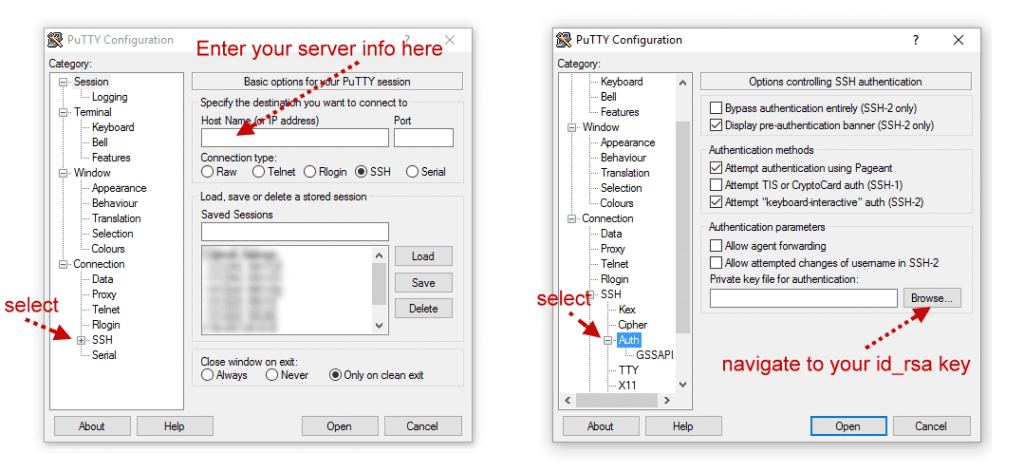
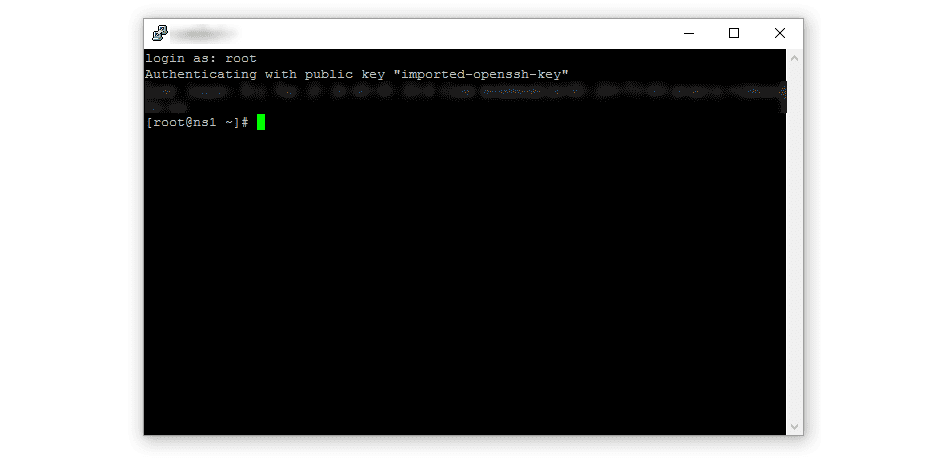
After those steps you will be able to connect using RSA 2048 Bits Key. The key is good for FileZilla, Putty or any other program that support KeyFile Login.
FILEZILLA
* Make sure to have the latest version. In older version you don’t have the option of using a KEY File !
PUTTY
NOTE: Make sure those options are there in /etc/ssh/sshd_config
# The default is to check both .ssh/authorized_keys and .ssh/authorized_keys2
# but this is overridden so installations will only check .ssh/authorized_keys
AuthorizedKeysFile .ssh/authorized_keys
# To disable tunneled clear text passwords, change to no here!
#PasswordAuthentication yes
#PermitEmptyPasswords no
PasswordAuthentication no
# Change to no to disable s/key passwords
#ChallengeResponseAuthentication yes
ChallengeResponseAuthentication no
Et voilà!


