Preparing Your Server for Magento
Have fun!!!!!
The following sections discuss how to download and install prerequisite software and install Magento CE or EE on a system running:
- Ubuntu 10 or later, or CentOS 6
- Apache 2.x
- nginx 1.7.x
- PHP 5.4 and required extensions
- MySQL database
SELinux Prerequisite
Security Enhanced Linux (SELinux) enables CentOS and Ubuntu administrators greater access control over their servers. If you’re using SELinux and Apache must initiate a connection to another host, you must run the commands discussed in this section.
If Apache and the database server are on the same host, you can skip this section and continue with Opening Ports In Your Firewall.
To enable Apache to initiate a connection to another host with SELinux enabled:
- To determine if SELinux is enabled, use the following command:
getenforce
Enforcing displays to confirm that SELinux is running.
- Enter one of the following commands:
Opening Ports In Your Firewall
Depending on your security requirements, you might find it necessary to open port 80 and other ports in your firewall. Because of the sensitive nature of networking security, Magento strongly recommends you consult with your IT department before proceeding. Following are some suggested references:
Creating phpinfo.php
phpinfo.php displays a large amount of information about PHP and its extensions. Add the following code anywhere in your web server’s docroot:
<?php
// Show all information, defaults to INFO_ALL
phpinfo();
To view the results, enter the following URL in your browser’s location or address field:
http://web-server-ip-or-host/phpinfo.php
Installing phpmyadmin
phpmyadmin is an easy-to-use, free database administration utility. You can use it to check and manipulate the contents of your database. You must log in to phpmyadmin as the MySQL database administrative user.
For more information about phpmyadmin, see the phpmyadmin home page.
For more detailed information about installation, see the phpmyadmin installation documentation.
To install phpmyadmin on CentOS:
- Download the epel RPM for the version of CentOS you’re using. A sample follows.
cd /tmp
wget http://download.fedoraproject.org/pub/epel/6/i386/epel-release-6-8.noarch.rpm
rpm -ivh epel-release-6-8.noarch.rpm
- Install
phpmyadmin as follows:yum -y install phpmyadmin
- Authorize access to phpmyadmin from your machine’s IP address.
- Open the following file for editing:
vim /etc/httpd/conf.d/phpMyAdmin.conf
- Replace the following IP address with your IP address
#Require ip 127.0.0.1
For example,
Require ip 192.51.100.101
- Replace the following IP with your IP address
#Allow from 127.0.0.1
For example,
Allow from 192.51.100.101
- Save your changes to
/etc/httpd/conf.d/phpMyAdmin.conf and exit the text editor. - Restart Apache.
service httpd restart
- To use phpmyadmin, enter the following command in your browser’s address or location field:
http://host-or-ip-address/phpmyadmin
- When prompted, log in using your MySQL database
root or administrative user’s user name and password.
Creating a Magento Database Instance
This section discusses how to create a new database instance for Magento. Although a new database instance is recommended, you can optionally install Magento into an existing database instance. If you choose to do that, skip this section and continue with Installing Optional Sample Data.
 Note
Note: Before you continue, review the information about MySQL discussed in
Prerequisites.
To create a new database instance:
- Log in to your database server as any user.
- Enter the following commands in the order shown to create a database instance named
magento:mysql -u root -p
#Enter the remaining commands at the mysql> prompt.
create database magento;
GRANT ALL ON magento.* TO magento@localhost IDENTIFIED BY 'magento';
- For MySQL versions between 5.0.2 and 5.1.6, you must enter this command:
GRANT SUPER ON *.* TO 'magento'@'localhost';
- After you’re done, enter
exit - Test the database instance.
mysql -u magento -p
Messages similar to the following display to confirm you successfully created the database instance. If errors display, repeat the preceding commands.
Welcome to the MySQL monitor.  Commands end with ; or \g.
Your MySQL connection id is 20
Server version: 5.1.67 Source distribution

Copyright (c) 2000, 2012, Oracle and/or its affiliates. All rights reserved.

Oracle is a registered trademark of Oracle Corporation and/or its
affiliates. Other names may be trademarks of their respective
owners.

Type 'help;' or '\h' for help. Type '\c' to clear the current input statement.
Extract the Magento installation archive on your web server’s docroot.
The path on Ubuntu is typically /var/www
The path on CentOS is typically /var/www/html
Examples follow:
To optionally install Magento sample data, continue with the next section.
To install Magento without sample data, continue with Setting File and Directory Ownership and Privileges.
Installing Optional Sample Data
Magento provides sample data you can optionally install to give you an idea of what products look like in the Admin Panel and in your web store. You can use this sample data to learn how Magento works and to experiment with custom themes.
You must install sample data on the file system and in the database before you install Magento.
Note: Only if your database is shared between more than one Magento installation. Database table names used by the sample data are not configurable. To use sample data with a new Magento installation, you must manually add a prefix to all sample data tables and use the same prefix when you install Magento.
To skip sample data installation, continue with Setting File and Directory Ownership and Privileges.
To install Magento sample data:
- Download the sample data from one of the locations discussed in Getting Magento CE or EE.
- If necessary, transfer the sample data to your Magento server.
- On your Magento server, extract the sample data archive to a directory other than your Magento installation directory.
- Make note of the path to the sample data’s
media subdirectory. - Change to the
[your Magento install dir]/media directory.#Ubuntu example
cd /var/www/magento/media
#CentOS example
cd /var/www/html/magento/media
- As a user with privileges to write to the Magento installation directories (typically the web server user), copy the sample data’s
media directory and subdirectories to your Magento installation directory.
For example, to copy Magento sample data from /home/username to /var/www/magento, entercp -R /home/username/media/* .
- Magento CE 1.9 and Magento EE 1.14 only. You must also copy the sample data’s
skin directory to [your Magento install dir]/skin as follows:
For example, to copy Magento skin files from /home/username/skin to /var/www/magento/skin, entercd [your Magento install dir]/skin
cp -R /home/username/skin/* .
- Import the CE or EE sample data into your MySQL database as follows:
mysql -u root -p magento-db-instance-name < path-to-sample-data-extract-dir/sample-data-filename.sql
EE 1.14 example
mysql -u root -p magento < /home/username/magento_sample_data_for_1.14.0.0.sql
Setting File and Directory Ownership and Privileges
Magento recommends the following ownership and privilege settings for files and directories in the Magento installation directory:
- The Magento installation directory and all subdirectories are owned by the web server user.
This enables the web server to change files in these subdirectories but other users cannot access them (except a higher-level user such as root). - All directories have 700 permissions (
drwx------).
700 permissions give full control (that is, read/write/execute) to the owner and no permissions to anyone else. - All files have 600 permissions (
-rw-------).
600 permissions mean the owner can read and write but other users have no permissions.
Note: The way you set permissions and ownership depends on whether Magento is running on a dedicated or hosted system:
- Hosted: A Magento server located on a hosting provider. A hosted system typically does not enable you to elevate to
root. The web server typically runs as an ordinary user. Magento assumes you log in as this user to start and stop the web server and that you already own all the files and directories in the Magento installation directory. You can use chmod to change permissions on files and directories. - Dedicated: A Magento server you control and operate. Unlike a hosted system, you can elevate to
root and, as root, you can use the chown and chmod commands to set ownership and privileges in the Magento installation directory.
To set privileges and ownership:
- Log in to your Magento server.
- Change to your Magento installation directory:
#Ubuntu example
cd /var/www/magento

#CentOS example
cd /var/www/html/magento
- Dedicated Magento server only. Enter the following command to set ownership of the Magento installation directory and all its subdirectories:
chown -R web-server-user-name .
For example, on Ubuntu where Apache usually runs as www-data, enter
chown -R www-data .
- Enter the following commands to set directory permissions to 700 and file permissions to 600:
find . -type d -exec chmod 700 {} \;
find . -type f -exec chmod 600 {} \;
Installing Magento CE or EE
This section discusses how to run the Magento installer, using Magento EE as an example. The Magento CE installer has exactly the same options; only the appearance is different.
Important: The procedure that follows assumes that your web server and database server are on the same host. If they are installed on different hosts, additional tasks are required.
Get help before you continue your installation.
To install Magento CE or EE:
- Complete all of the tasks discussed earlier in this article.
- Enter the following URL in your web browser’s address or location field:
web-server-ip-or-host:port/magento-path/magento
For example, if your web server is http://www.example.com, listens on port 80, and Magento is installed in the web server docroot’s magento subdirectory, enter
http://www.example.com/magento
Select the check box that indicates you agree to the terms and conditions, and click Continue.
- On the Localization page, enter the following information.
| Option | Meaning |
|---|
| Locale | From the list, click the option that best matches the locale in which your Magento server resides. |
| Time Zone | From the list, click the option that best matches the time zone in which your Magento server resides. |
| Default currency | From the list, click the default currency to use on your Magento web store. |
The following figure shows an example of configuring Magento for US English in the US Central time zone and using the US Dollar as the default currency.

- Click Continue.
The Configuration page displays. Each of its three sections is discussed in the following step. - In the Configuration page, enter the following information:
- In the Database Configuration section, enter the following information.
| Option | Meaning |
|---|
| Database Type | From the list, click MySQL. |
| Host | Enter the database server’s fully qualified host name or IP address. Use the default setting of localhost if your database server is on the same host as your web server. |
| Database Name | Enter the name of the Magento database instance in which you want to install the Magento database tables. |
| User Name | Enter the user name of the Magento database instance owner. |
| User Password | Enter the Magento database owner’s password. |
| Tables Prefix | (Optional.) Use only if you’re installing the Magento database tables in a database instance that has Magento tables in it already. In that case, enter a prefix to identify the Magento tables for this installation.Some customers have more than one Magento instance running on a server with all tables in the same database. This option enables those customers to share the database server with more than one Magento installation. |
A sample follows.

- In the Web Access Options section, enter the following information.
| Option | Meaning |
|---|
| Base URL | Enter the base URL to use to access the Magento Admin Panel and your Magento web store. |
| Admin Path | Enter the path to access the Admin Panel. This path is appended to Base URL.
For example, if Base URL is http://www.example.com and Admin Path is admin, the Admin Panel’s URL is http://www.example.com/admin—provided you configured your web server for server rewrites. |
| Enable Charts | Select the check box to display charts on the Admin Panel. |
| Skip Base URL Validation Before the Next Step | Clearing this check box validates your server’s base URL by performing an HTTP GET. Clear this check box unless your web server’s base URL is not verifiable; for example, in a development or test environment. |
| Use Web Server (Apache) Rewrites | Select this check box to enable the use of the Apache mod_rewrite module. You can select this check box only if you configured Apache to use server rewrites. |
| Use Secure URLs (SSL) | Select this check box only if your web server supports SSL. |
A sample follows.

- In the Session Storage Options section, click one of the following options:
- File to store user session data on the file system in the
[your Magento install dir]/var/session directory.
File-based session storage is appropriate unless the Magento file system access is slow or you have a clustered database. - Database to store user session data in the database.
Choose database storage if you have a clustered database; otherwise, there might not be much benefit over file-based storage.
- Click Continue.
Important: If errors display, you must resolve them before continuing.
- In the Create Admin Account page, enter the following information.
| Option | Meaning |
|---|
| First Name | Enter the first name of the user you want to identify as the Magento web store owner. |
| Last Name | Enter the user’s last name. |
| Email | Enter the user’s email address. |
| Username | Enter the Magento Admin Panel administrator’s user name. (You can create additional Magento administrators later.) |
| Password | Enter the user’s password. |
| Confirm Password | Enter the user’s password again for verification. |
| Encryption Key | If you have one, enter a key to encrypt sensitive data (such as passwords and personally identifiable customer information) in the Magento database. If you don’t have one, Magento generates one for you.
The encryption key is stored in [your Magento install dir]/app/etc/local.xml. |
A sample follows.

- Click Continue.
The following page displays to indicate a successful installation.
Verifying that Magento CE or Magento EE Installed Successfully
To make sure Magento installed properly, you should log in to the Admin Panel to verify the Magento version.
You can also import products into Magento or perform other tasks that verify you can write to the database.
- In a web browser’s location or address field, enter the URL to the Admin Panel. An example follows:
http://www.example.com/magento/admin
(The Admin Panel URL is a combination of the Base URL and Admin Path fields you entered when you installed Magento.
- Log in to the Admin Panel as an administrator.
- Scroll to the bottom of the page; the version should display as 1.14 (Magento EE) or 1.9.0.0 (Magento CE).
The following figure shows an example.

Congratulations! You successfully installed Magento!
Setting Up Cron Jobs
Several Magento features require at least one cron job, which schedules activities to occur in the future. A partial list of these activities follows:
- Catalog price rules
- Newsletters
- Generating Google sitemaps
- Customer Alerts/Notifications (product price change, product back in stock)
- Reindexing (Magento EE 1.13 only)
- Private sales (Magento EE only)
- Automatic updating of currency rates
- Magento EE 1.14.1 and later, Magento CE 1.9.1 and later All Magento e-mails (including order confirmation and transactional)
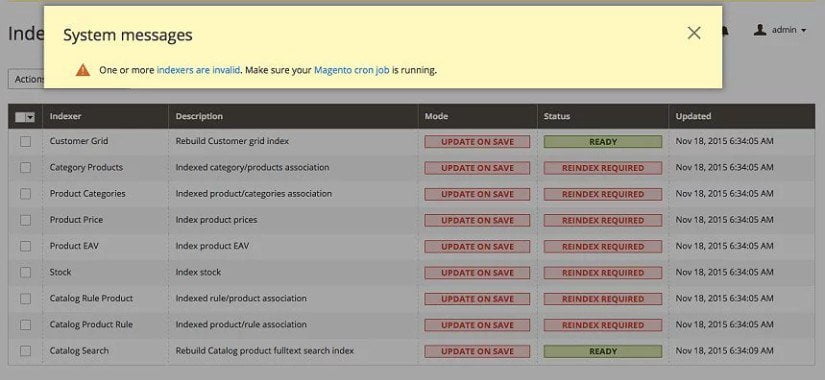
Note: Magento depends on proper cron job configuration for many important system functions, including indexing. Failure to set it up properly means Magento won’t function as expected.
Magento recommends running cron every minute for EE and every five minutes for CE.
UNIX systems schedule tasks to be performed by particular users using a crontab, which is a file that contains instructions to the cron daemon that tell the daemon in effect to “run this command at this time on this date”. Each user has its own crontab, and commands in any given crontab are executed as the user who owns the crontab.
For Magento, this user is the web server. To determine your web server’s user, enter the following command:
ps -o "user group command" -C httpd,apache2
In CentOS, the Apache user is typically apache; in Ubuntu, it’s typically www-data.
To create a cron job as the user who runs Apache, the following commands in the order shown:
- Create or edit a crontab for the Apache user:
crontab -u apache-user-name -e
- A text editor displays. (You might need to choose a text editor first.)
In the editor, enter the following:* * * * * /bin/sh /[your Magento install dir]/cron.sh
For example, for CentOS,
* * * * * /bin/sh /var/www/html/magento/cron.sh
- Save your changes to the crontab and exit the editor.
Setting Magento File System Permissions and Ownership After Installation
Setting Privileges and Ownership After You Install Magento
If you have installed Magento, you can set file system privileges and ownership as follows:
- For a dedicated Magento server, you set ownership of files and directory as the web server user. You set privileges as 500 (directories) and 400 (files).
- For a hosted Magento server on which the web server runs as the logged-in user name, you set privileges as as 500 (directories) and 400 (files).
Note: In both hosted and dedicated systems, you set the privileges for the media/ and var/ directories at 700/600 because they must be writable.
Following is an explanation of the privileges:
- 500 permissions for directories (
dr-x------) gives the web server user read and execute privileges to prevent the accidental deletion or modification of files in the directory. Other users have no access to Magento directories. - 400 permissions for files (
-r--------) prevent any user (even the web server user) from overwriting files.
This prevents attacks that depend on overwriting existing files with malicious content. - 700 permissions (
drwx------) for the media/ and var/ directories give full control (that is, read/write/execute) to the owner and no permissions to anyone else. - 600 permissions (
-rw-------) for files in the media/ and var/ directories enable the web server user to write to them and to overwrite them.
Note: On a dedicated system, all commands discussed in this article must be entered as a user with root privileges. On a hosted system, commands must be entered as the web server user.
To set up ownership and permissions on a dedicated Magento server:
- Dedicated Magento server only. As a user with
root privileges, find the web server user: - Change to the Magento installation directory.
On CentOS, this is typically /var/www/html/magento. On Ubuntu, it is typically /var/www/magento. - Dedicated Magento server only. As a user with
root privileges, enter the following command to set ownership of the Magento installation directory and all its subdirectories:chown -R web-server-user-name .
For example, on Ubuntu where Apache usually runs as www-data, enter
chown -R www-data .
- Enter the following commands to set permissions:
find . -type f -exec chmod 400 {} \;
find . -type d -exec chmod 500 {} \;
find var/ -type f -exec chmod 600 {} \;
find media/ -type f -exec chmod 600 {} \;
find var/ -type d -exec chmod 700 {} \;
find media/ -type d -exec chmod 700 {} \;
chmod 700 includes
chmod 600 includes/config.php
Securing Magento Extensions
If you set permissions and ownership as discussed in this article, you must change permissions temporarily to be able to use the Magento Connect Manager in the Admin Panel. (System > Magento Connect > Magento Connect Manager). You can still install extensions manually, however; that is beyond the scope of this article.
You can confirm the issue when you access Magento Connect Manager in the Admin Panel. The following error displays on the Extensions tab page:
Warning: Your Magento folder does not have sufficient write permissions.
To use Magento Connect Manager, you must:
- Temporarily set 700/600 permissions on your Magento installation directory and subdirectories.
- Install the extension.
Magento Connect Manager typically installs extensions with 777 (world-writable) permissions. - Set permissions back to their recommended values.
In addition, if you have a dedicated Magento server, you should check ownership of files and directories and reset them if necessary. Often, Magento Connect Manager installs extensions with user and group ownership both set to the web server user.
Temporarily Resetting Permissions on Your Magento Installation Directory
To temporarily set file and directory permissions so you can use Magento Connect Manager:
- Change to the Magento installation directory.
On CentOS, this is typically /var/www/html/magento. On Ubuntu, it is typically /var/www/magento. - Enter the following commands:
find . -type d -exec chmod 700 {} \;
find . -type f -exec chmod 600 {} \; - Install your extension using the Magento Connect Manager.
Restoring the Recommended Permissions
Enter the commands discussed in this section to return permissions and ownership to their recommended values after you have installed extensions.
To restore Magento installation directory permissions:
- Change to the Magento installation directory.
On CentOS, this is typically /var/www/html/magento. On Ubuntu, it is typically /var/www/magento. - Dedicated Magento server only. As a user with
root privileges, enter the following command to set ownership of the Magento installation directory and all its subdirectories:chown -R web-server-user-name .
For example, on Ubuntu where Apache usually runs as www-data, enter
chown -R www-data .
- Enter the following commands to set permissions:
find . -type f -exec chmod 400 {} \;
find . -type d -exec chmod 500 {} \;
find var/ -type f -exec chmod 600 {} \;
find media/ -type f -exec chmod 600 {} \;
find var/ -type d -exec chmod 700 {} \;
find media/ -type d -exec chmod 700 {} \;
Applying Magento Support Patches
Magento Support typically provides a shell script to patch various Magento issues. When you run the shell script, file and directory permissions are typically not changed; however, the files provided with the patch are owned by the user who applied the patch. If you have a dedicated Magento server, this is typically root; therefore, after applying the patch, you must change file ownership.
If you are required to apply a patch provided by Magento Support, use the following process:
- Get the patch from Magento Support.
- Follow the instructions provided with the patch.
Typically, you run a shell script as either a user with root privileges or as the owner of the Magento installation directory. - If you ran the patch as the owner of the Magento installation directory, you’re done. File permissions aren’t usually changed; however, you should check and reapply file and directory privileges if necessary.
- If you ran the patch as a user with
root privileges, use the following steps to reset file ownership: - Dedicated Magento server only. Find the web server user:
- As a user with
root privileges, enter the following command from the Magento installation directory:
chown -R web-server-user-name . For example, on Ubuntu where Apache usually runs as www-data, enter chown -R www-data.
During the installation, errors like the following display:
Path "/var/www/html/magento/app/etc" must be writable.