Disable Firewire in Centos 7

Open the file /etc/modprobe.d/blacklist
* Don’t worry if the file is empty just populate it!

# nano /etc/modprobe.d/blacklist

or

# sudo nano /etc/modproble.d/blacklist

~ add these lines:

blacklist firewire_core
blacklist firewire_ohci

Save and Reboot!

Install SysStat to enable system monitoring

Install SysStat
# yum -y install sysstat
# systemctl start sysstat
# systemctl enable sysstat

Check the status of SysStat
# systemctl status sysstat

Add SysStat into a Cron Job
# cat /etc/cron.d/sysstat

# Run system activity accounting tool every 10 minutes
*/10 * * * * root /usr/lib64/sa/sa1 1 1
# 0 * * * * root /usr/lib64/sa/sa1 600 6 &
# Generate a daily summary of process accounting at 23:53
53 23 * * * root /usr/lib64/sa/sa2 -A

Settings of SysStat

/etc/sysconfig/sysstat

# sysstat-10.1.5 configuration file.

# How long to keep log files (in days).
# If value is greater than 28, then log files are kept in
# multiple directories, one for each month.

HISTORY=28

# Compress (using gzip or bzip2) sa and sar files older than (in days):

COMPRESSAFTER=31

# Parameters for the system activity data collector
# which are used for the generation of log files

# *note

SADC_OPTIONS=”-S DISK”

# *note : valid options

INT     ⇒  System Interrupts
DISK    ⇒  Block Devices
SNMP    ⇒  SNMP statistics
IPV6    ⇒  IPv6 statistics
POWER   ⇒  Power Management statistics
ALL     ⇒  All of the above
XDISK   ⇒  DISK + Partition statistics
XALL    ⇒  All of the above (ALL + XDISK)

Setup psacct to Monitor User Activity in Linux

It is very important to know what are the activities for applications and users in linux operating system. This will be very useful in later time or in case of problems. For this purpose, i would recommend psacct tools to be install. psacct is a free monitoring program to monitor users and applications activity on linux server. This program will display how long user accessing the server, what command are they issuing, how many processes and display logs for commands.

If you are runninng Linux CentOS or Redhat, you should use the following command to install pssacct :

[root@test ~]# yum install psacct -y

By default psacct is disabled on Linux. We should manually start it :

[root@test ~]# systemctl start psacct

To enable psacct on your next reboot use the following command :

[root@test ~]# systemctl enable psacct

Check the status of psacct

[root@test ~]# systemctl status psacct

Other usage from that come in psacct or acct package :

ac command prints the statistics of user logins/logouts (connect time) in hours.
lastcomm command prints the information of previously executed commands of user.
accton commands is used to turn on/off process for accounting.
sa command summarizes information of previously executed commands.
last and lastb commands show listing of last logged in users.

Auditd service

Reload systemd daemon to reload changes made in auditd service unit file:

systemctl daemon-reload

Restart the auditd service: service auditd restart

RULE EXAMPLES

## Remove any existing rules
-D

## Buffer Size
## Feel free to increase this if the machine panic's
-b 8192

## Failure Mode
## Possible values are 0 (silent), 1 (printk, print a failure message),
## and 2 (panic, halt the system).
-f 1

## Audit the audit logs.
## successful and unsuccessful attempts to read information from the
## audit records; all modifications to the audit trail
-w /var/log/audit/ -k auditlog

## Auditd configuration
## modifications to audit configuration that occur while the audit
## collection functions are operating.
-w /etc/audit/ -p wa -k auditconfig
-w /etc/libaudit.conf -p wa -k auditconfig
-w /etc/audisp/ -p wa -k audispconfig

## Monitor for use of audit management tools
-w /sbin/auditctl -p x -k audittools
-w /sbin/auditd -p x -k audittools

## special files
-a exit,always -F arch=b32 -S mknod -S mknodat -k specialfiles
-a exit,always -F arch=b64 -S mknod -S mknodat -k specialfiles

## Mount operations
-a exit,always -F arch=b32 -S mount -S umount -S umount2 -k mount
-a exit,always -F arch=b64 -S mount -S umount2 -k mount

## changes to the time
##
-a exit,always -F arch=b32 -S adjtimex -S settimeofday -S stime -S clock_settime -k time
-a exit,always -F arch=b64 -S adjtimex -S settimeofday -S clock_settime -k time

## Use stunnel
-w /usr/sbin/stunnel -p x -k stunnel

## cron configuration & scheduled jobs
-w /etc/cron.allow -p wa -k cron
-w /etc/cron.deny -p wa -k cron
-w /etc/cron.d/ -p wa -k cron
-w /etc/cron.daily/ -p wa -k cron
-w /etc/cron.hourly/ -p wa -k cron
-w /etc/cron.monthly/ -p wa -k cron
-w /etc/cron.weekly/ -p wa -k cron
-w /etc/crontab -p wa -k cron
-w /var/spool/cron/crontabs/ -k cron

## user, group, password databases
-w /etc/group -p wa -k etcgroup
-w /etc/passwd -p wa -k etcpasswd
-w /etc/gshadow -k etcgroup
-w /etc/shadow -k etcpasswd
-w /etc/security/opasswd -k opasswd

## monitor usage of passwd
-w /usr/bin/passwd -p x -k passwd_modification

#Monitor for use of tools to change group identifiers
-w /usr/sbin/groupadd -p x -k group_modification
-w /usr/sbin/groupmod -p x -k group_modification
-w /usr/sbin/addgroup -p x -k group_modification
-w /usr/sbin/useradd -p x -k user_modification
-w /usr/sbin/usermod -p x -k user_modification
-w /usr/sbin/adduser -p x -k user_modification

## login configuration and information
-w /etc/login.defs -p wa -k login
-w /etc/securetty -p wa -k login
-w /var/log/faillog -p wa -k login
-w /var/log/lastlog -p wa -k login
-w /var/log/tallylog -p wa -k login

## network configuration
-w /etc/hosts -p wa -k hosts
-w /etc/network/ -p wa -k network

## system startup scripts
-w /etc/inittab -p wa -k init
-w /etc/init.d/ -p wa -k init
-w /etc/init/ -p wa -k init

## library search paths
-w /etc/ld.so.conf -p wa -k libpath

## local time zone
-w /etc/localtime -p wa -k localtime

## kernel parameters
-w /etc/sysctl.conf -p wa -k sysctl

## modprobe configuration
-w /etc/modprobe.conf -p wa -k modprobe

## pam configuration
-w /etc/pam.d/ -p wa -k pam
-w /etc/security/limits.conf -p wa  -k pam
-w /etc/security/pam_env.conf -p wa -k pam
-w /etc/security/namespace.conf -p wa -k pam
-w /etc/security/namespace.init -p wa -k pam

## GDS specific secrets
-w /etc/puppet/ssl -p wa -k puppet_ssl

## postfix configuration
-w /etc/aliases -p wa -k mail
-w /etc/postfix/ -p wa -k mail

## ssh configuration
-w /etc/ssh/sshd_config -k sshd

## changes to hostname
-a exit,always -F arch=b32 -S sethostname -k hostname
-a exit,always -F arch=b64 -S sethostname -k hostname

## changes to issue
-w /etc/issue -p wa -k etcissue
-w /etc/issue.net -p wa -k etcissue

## this was to noisy currently.
# log all commands executed by an effective id of 0 aka root.
-a exit,always -F arch=b64 -F euid=0 -S execve -k rootcmd
-a exit,always -F arch=b32 -F euid=0 -S execve -k rootcmd

## Capture all failures to access on critical elements
-a exit,always -F arch=b64 -S open -F dir=/etc -F success=0 -k unauthedfileacess
-a exit,always -F arch=b64 -S open -F dir=/bin -F success=0 -k unauthedfileacess
-a exit,always -F arch=b64 -S open -F dir=/sbin -F success=0 -k unauthedfileacess
-a exit,always -F arch=b64 -S open -F dir=/usr/bin -F success=0 -k unauthedfileacess
-a exit,always -F arch=b64 -S open -F dir=/usr/sbin -F success=0 -k unauthedfileacess
-a exit,always -F arch=b64 -S open -F dir=/var -F success=0 -k unauthedfileacess
-a exit,always -F arch=b64 -S open -F dir=/home -F success=0 -k unauthedfileacess
-a exit,always -F arch=b64 -S open -F dir=/srv -F success=0 -k unauthedfileacess

## Monitor for use of process ID change (switching accounts) applications
-w /bin/su -p x -k priv_esc
-w /usr/bin/sudo -p x -k priv_esc
-w /etc/sudoers -p rw -k priv_esc

## Monitor usage of commands to change power state
-w /sbin/shutdown -p x -k power
-w /sbin/poweroff -p x -k power
-w /sbin/reboot -p x -k power
-w /sbin/halt -p x -k power

## Make the configuration immutable
-e 2

P.S After a reboot, total crash with auditd, IP internal Conflict ! and total CSF block! Good luck with this one!

How to find Hardware information on Live (running) Servers & Systems

dmidecode is a tool for dumping a computer DMI (some say SMBIOS) table contents in a human-readable format. This table contains a description of the system hardware components, as well as other useful pieces of information such as serial numbers  and  BIOS  revision.  You can retrieve this information without having to probe for the actual hardware.  While this is a good point in terms of report speed and safeness, this also makes the presented information possibly unreliable.

The  DMI  table  does not  only describe what the system is currently made of, it also can report the possible evolutions (such as the fastest supported CPU or the maximal amount of memory supported).

SMBIOS stands for System Management BIOS, while DMI stands for Desktop Management Interface. Both standards are  tightly related and developed by the DMTF (Desktop Management Task Force).

# yum install dmidecode

# dmidecode –type bios [About BIOS Details]

# dmidecode –type system [About System Information]

# dmidecode –type baseboard [About NIC & Storage Card]

# dmidecode –type chassis [About Chassis Information]

# dmidecode –type processor [About Processor Information]

# dmidecode –type memory [About Memory Information]

# dmidecode –type cache [About Cache Information]

# dmidecode –type connector [About USB Information]

# dmidecode –type slot [About Slot Information]

How to read or view utmp, wtmp and btmp files in Linux

In Linux operating systems everything is logged some where. Most of the system logs are logged in to /var/log folder. This folder contains logs related to different services and applications. In this folder we have some files such as utmp, wtmp and btmp. These files contains all the details about login’s and logout’s which are from local as well as from remote systems and system status such as uptime etc.

utmp will give you complete picture of users logins at which terminals, logouts, system events and current status of the system, system boot time (used by uptime) etc.

wtmp gives historical data of utmp.

btmp records only failed login attempts.

Provide how logged in, when they logged in and when they logged out
# last

To open wtmp file and view its content use blow command
# last -f /var/log/wtmp

To see still logged in users view utmp file use last command
# last -f /var/run/utmp

To view btmp file use same command
# last -f /var/log/btmp

Disable USB Devices Hardening Centos 7

We would like to disable all USB devices connected to our HP Red Hat Linux based workstations. I would like to disable USB flash or hard drives, which users can use with physical access to a system to quickly copy sensitive data from it. How do I disable USB device support under CentOS Linux, RHEL version 5.x/6.x/7.x and Fedora latest version?

The USB storage drive automatically detects USB flash or hard drives. You can quickly force and disable USB storage devices under any Linux distribution. The modprobe program used for automatic kernel module loading. It can be configured not load the USB storage driver upon demand. This will prevent the modprobe program from loading the usb-storage module, but will not prevent root (or another privileged program) from using the insmod/modprobe program to load the module manually. USB sticks containing harmful malware may be used to steal your personal data. It is not uncommon for USB sticks to be used to carry and transmit destructive malware and viruses to computers. The attacker can target MS-Windows, macOS (OS X), Android and Linux based system.

usb-storage driver

The usb-storage.ko is the USB Mass Storage driver for Linux operating system. You can see the file by typing the following command:
# ls -l /lib/modules/$(uname -r)/kernel/drivers/usb/storage/usb-storage.ko

All you have to do is disable or remove the usb-storage.ko driver to restrict to use USB devices on Linux such as:

  1. USB keyboards
  2. USB mice
  3. USB pen drive
  4. USB hard disk
  5. Other USB block storage

BIOS option

You can also disable USB from system BIOS configuration option. Make sure BIOS is password protected. This is recommended option so that nobody can boot it from USB.

Notes:

In linux it’s even more easily done, by unloading the usb_storage module: for disable :-

# modprobe -r usb_storage

for enable :-

# modprobe -i usb_storage

The easiest way to disable usb storage device in linux is create following file And add following line inside the file

# touch /etc/modprobe.d/no-usb

install usb-storage /bin/true

Lynis new version 2.5.0

Lynis Security Auditing

Lynis is our system and security auditing tool for Linux, Mac OS X, and UNIX-based systems.

It provides insights in how well a system is hardened and what you can do, to improve your security defenses.

The software is open source and free to use. It is updated on a regular basis, to keep up with new technologies.

Security should be simple, but it is definitely not. With Lynis you gain quick insights in how well you are protecting your crown jewels. From your personal notebook to surf the web, up to where your company’s biggest secrets are stored.

We suggest people using it daily & compare the results for example:
https://linux-audit.com/find-differences-between-two-daily-lynis-audits

Installation steps:

cd /tmp
wget https://cisofy.com/files/lynis-2.5.0.tar.gz
tar xvfz lynis-2.5.0.tar.gz
mv lynis cd

Move all contents of /tmp/cd into /usr/local/lynis
* Make sure that  lynis file is 775 or else you will get a perm denied 😉

To scan the server first do a update!

# lynis update info

Then to actually scan the system:

# lynis audit system

Once the scan is over you will get a System Scan Summary
Note: This is the actual results of easy-admin.ca server

Lynis suggests also a very good things that might be tampered to make the system more secure, so using some of its output when I have time I’ll work out on hardening all servers.

Commercial support available

For companies who prefer additional support, we have also Lynis Enterprise. It uses Lynis as a client. On top of that, it has additional plugins, reporting, central management, a dashboard, and more guidance (e.g. hardening snippets). With Lynis in its core, you are assured of a stable piece of software, which is up-to-date.

Examples of plugins:

  • Compliance (e.g. HIPAA, PCI DSS, ISO27001)
  • Docker
  • File integrity
  • Systemd

Source: https://cisofy.com/lynis

NOTES:
# sysctl -a
# lynis show
# lynis –tests “SSH-7440”
# lynis show help
# lynis update info
# systemctl status -all

Protection for APACHE using mod_dosevasive

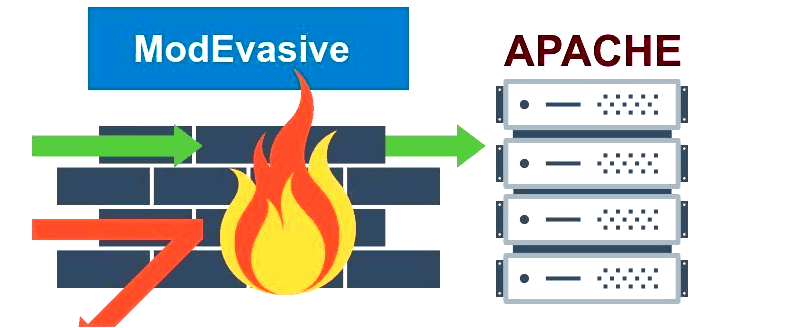
The mod_evasive Apache module, formerly known as mod_dosevasive, helps protect against DoS, DDoS (Distributed Denial of Service), and brute force attacks on the Apache web server. It can provide evasive action during attacks and report abuses via email and syslog facilities. The module works by creating an internal dynamic table of IP addresses and URIs as well as denying any single IP address from any of the following:

  • Requesting the same page more than a few times per second
  • Making more than 50 concurrent requests on the same child per second
  • Making any requests while temporarily blacklisted

If any of the above conditions are met, a 403 response is sent and the IP address is logged. Optionally, an email notification can be sent to the server owner or a system command can be run to block the IP address.

Step 1 — Installing mod_evasive

In this section, we will be installing the packages required for mod_evasive to function and finally install mod_evasive.

First, we need to install the EPEL (Extra Packages for Enterprise Linux) yum repository on the server. EPEL is a Fedora Special Interest Group that creates, maintains, and manages a high quality set of open source add-on software packages for Enterprise Linux. Run the following command to install and enable the EPEL repository on your server:

On CentOS 7:

sudo rpm -ivh http://dl.fedoraproject.org/pub/epel/7/x86_64/e/epel-release-7-5.noarch.rpm

Let us verify that the EPEL repo is enabled using:

sudo yum repolist

If enabled, you will see the following repo listed in the output:

epel/x86_64                                                            Extra Packages for Enterprise Linux 7 - x86_64

Now, let us protect the base packages from EPEL using the yum plugin protectbase.

sudo yum install yum-plugin-protectbase.noarch -y

The purpose of the protectbase plugin is to protect certain yum repositories from updates from other repositories. Packages in the protected repositories will not be updated or overridden by packages in non-protected repositories even if the non-protected repo has a later version.

Now we are ready to install mod_evasive module. Run the following command to install it:

sudo yum install mod_evasive -y

Step 2 — Verifying the Installation

Now that mod_evasive is installed, let’s verify that configuration file has been installed and that the module is being loaded.

During installation, the mod_evasive configuration file /etc/httpd/conf.d/mod_evasive.conf was added. To verify this run:

sudo ls -al /etc/httpd/conf.d/mod_evasive.conf

Output should look similar to:

-rw-r--r-- 1 root root 3473 Jul 21 01:41 /etc/httpd/conf.d/mod_evasive.conf

By default, the following LoadModule line will be added to the top of configuration file mod_evasive.conf. Open the file and add the line if it is not already present. This line tells the Apache web server to load and use the mod_evasive module.

On CentOS 7, the line should read as follows:

/etc/httpd/conf.d/mod_evasive.conf
LoadModule evasive20_module modules/mod_evasive24.so

Let us list the modules loaded for the Apache web server and look for mod_evasive:

sudo  httpd -M | grep evasive

The output should show:

evasive20_module (shared)

Step 3 — Configuring mod_evasive

Now that the installation is complete and verified, let us look into the configuration of the module. mod_evasive can be easily customized through the mod_evasive.conf configuration file. We will discuss some of the configuration parameters in this tutorial. Please refer to the configuration file for information on all the parameters — it contains a description of each parameter.

One of the configuration options you need to change is DOSEmailNotify. This is a very useful directive. If this value is set, an email will be sent to the email address specified whenever an IP address is blacklisted. The email body will show mod_evasive HTTP Blacklisted 222.222.222.251

For example, if you want to send mod_evasive alerts to say, johndoh@example.com, edit the file:

sudo nano /etc/httpd/conf.d/mod_evasive.conf

Uncomment the DOSEmailNotify line by removing the # in front of the line, and change the email address to yours:

/etc/httpd/conf.d/mod_evasive.conf
DOSEmailNotify   youremail@yourdomain.com

Note: mod_evasive uses /bin/mail for sending email alerts. You need to have a mail server installed and working.

Another parameter you might want to set is DOSWhitelist. Using this option, IP addresses of trusted clients can be added to the whitelist to ensure they are never denied. The purpose of whitelisting is to protect software, scripts, local search bots, or other automated tools from being denied for requesting large amounts of data from the server.

To whitelist an IP address, for example 222.222.222.252, add an entry to the configuration file like this:

/etc/httpd/conf.d/mod_evasive.conf
DOSWhitelist    222.222.222.252

Wildcards can be used on up to the last 3 octets of the IP address if necessary.

To whitelist multiple IP addresses from different IP ranges, you can add separate DOSWhitelist lines in the configuration file like this:

/etc/httpd/conf.d/mod_evasive.conf
DOSWhitelist    222.222.222.251
DOSWhitelist    222.222.222.222

DOSPageCount and DOSSiteCount are two other parameters recommended to be changed to less aggressive values to avoid clients getting blocked unnecessarily.

DOSPageCount is the limit for the number of requests for the same page per page interval (usually set to one second) by an IP address. Once the threshold for that interval has been exceeded, the IP address of the client will be added to the blocked list. The default value is set quite low at 2. You can change it to a higher value, say 20, by editing the following in /etc/httpd/conf.d/mod_evasive.conf:

/etc/httpd/conf.d/mod_evasive.conf
DOSPageCount 20

DOSSiteCount is the limit for the total number of requests for the same website by an IP address per site interval (defaults to 1 second). To change it to a larger value such as 100 seconds:

/etc/httpd/conf.d/mod_evasive.conf
DOSSiteCount 100

There are a few other parameters you can change to achieve better performance.

One is DOSBlockingPeriod, which is the amount of time (in seconds) that a client (IP address) will be blocked for if they are added to the blocked list. During this time, all subsequent requests from the client will result in a 403 (Forbidden) error and the timer being reset (defaults to 10 seconds).

For example, if you want to increase the blocking period to 300 seconds:

/etc/httpd/conf.d/mod_evasive.conf
DOSBlockingPeriod    300

Another is DOSLogDir which refers to the temporary directory used by mod_evasive. By default /tmp will be used for a locking mechanism, which opens some security issues if your system is open to shell users. In the event you have non-privileged shell users, you will want to create a directory writeable only to the user Apache is running as (usually apache) then set this parameter in your mod_evasive.conf file.

For example, to set the directory used by mod_evasive to /var/log/mod_evasive, create the directory using:

sudo mkdir /var/log/mod_evasive

Then set the ownership to apache user:

sudo chown -R apache:apache /var/log/mod_evasive

Now edit the mod_evasive configuration and change the directory as follows:

/etc/httpd/conf.d/mod_evasive.conf
DOSLogDir           "/var/log/mod_evasive"

Another parameter is DOSSystemCommand. If a value is set, the command specified will be executed whenever an IP address is blacklisted. Using this parameter, you can integrate mod_evasive with the firewall installed on your server or a shell script and block the IP addresses blacklisted by mod_evasive in the firewall.

Step 4 — Loading the mod_evasive Module

Once we have made the changes in the configuration file, we need to restart the Apache web server for them to take effect. Run the following command to restart Apache.

On CentOS 7:

sudo systemctl restart httpd.service

Note: Please note that mod_evasive appears to conflict with the FrontPage Server Extensions. You might also want to check your Apache web server settings to make sure mod_evasive is able to function well. Suggested Apache tweaks are to have a very high value for MaxRequestsPerChild but not unlimited (A value of zero implies unlimited) and to have KeepAlive enabled with KeepAliveTimeout set reasonably long.

Step 5 — Testing mod_evasive

Let us do a short test to see if the module is working correctly. We will be using a perl script test.pl written by mod_evasive developers. To execute the script, we need to first install perl package on the server using:

sudo yum install -y perl

The test script is installed with mod_evasive at the following location:

/usr/share/doc/mod_evasive-1.10.1/test.pl

By default, the test script requests the same page from your Apache web server 100 times in a row to trigger mod_evasive. In the last section, we modified mod_evasive to be more tolerant of requests per second to the same page. We need to change the script to 200 requests in a row instead of 100 to make sure we trigger all of mod_evasive’s notification methods.

Edit /usr/share/doc/mod_evasive-1.10.1/test.pl:

sudo nano /usr/share/doc/mod_evasive-1.10.1/test.pl

Find the following line:

/usr/share/doc/mod_evasive-1.10.1/test.pl
for(0..100) {

Replace 100 with 200:

/usr/share/doc/mod_evasive-1.10.1/test.pl
for(0..200) {

Save and exit.

To execute the script, run:

sudo perl /usr/share/doc/mod_evasive-1.10.1/test.pl

You should see output similar to:

HTTP/1.1 403 Forbidden
...

The script makes 100 requests to your web server. the 403 response code indicates access is denied by the web server. mod_evasive also logs to syslog when the IP address is blocked. Check the log file using:

sudo tailf /var/log/messages

It should show a line similar to:

May 21 00:11:18 servername mod_evasive[18290]: Blacklisting address 127.0.0.1: possible DoS attack.

indicating the IP address is blocked by mod_evasive.

If you have configured mod_evasive to send email alerts when an IP is blocked, you will have an email in your inbox with the following content:

mod_evasive HTTP Blacklisted 127.0.0.1

Conclusion

mod_evasive is great at fending off single server, scripted attacks as well as distributed attacks. However, it is only useful to the point of your server’s total bandwidth and processor capacity for processing and responding to invalid requests. For this reason, it is a good idea to integrate this module with your server firewall for maximum protection. Without a really good infrastructure and a firewall in place, a heavy DDoS might still take you offline. If an attack is very heavy and persistent, you might need to move to a hardware-based DDoS mitigation solution.

Source : www.digitalocean.com

mod_parmguard for Apache Webserver

The Apache module that will protect your scripts against hacker’s input !

There is an Apache module, mod_parmguard (http://www.trickytools.com/php/mod_parmguard.php), which is close to providing a complete solution to positive security model requirements. When I checked Version 1.3, the module was not stable for production use, but you should check on it from time to time to see if it improves.

Download version 1.4

Documentation

Its configuration is XML-based and, for this purpose, easier to use than Apache-style configuration typical for other modules. Here’s a short excerpt from its documentation for a page with a single parameter:

<url>
    <match>validate.php</match>
    <parm name="name">
      <type name="string"/>
      <attr name="maxlen" value="10"/>
      <attr name="charclass" value="^[a-zA-Z]+$"/>
    </parm>
</url>

Other interesting features of this module include a spider that analyzes the application and produces configuration data automatically and the ability to generate custom data types and save time writing the configuration.

Note: https://books.google.ca/books?id=zJUuToRbZ7oC&pg=PA149&lpg=PA149&dq=mod_parmguard&source=bl&ots=RI2WYAgchh&sig=KvdOU6_UALjcF3ZADX5RSi1R0LI&hl=en&sa=X&ved=0ahUKEwjVyeq72PzTAhVBpCwKHcEaDLwQ6AEIWDAO#v=onepage&q=mod_parmguard&f=false